Author Archive

6 Cheap Ways To Improve Your Home’s Value

18th, February at 10:58 AM | Exterior and Interior Home Remodeling

Looking to increase the value of your home? Thinking about selling in the near future, but want to ensure that you can demand top dollar for your property? At Murtagh Bros., Inc., our contractors are experts in remodeling and updating tired old homes to maximize sale values. While a new addition can really ensure that your home’s value tops out at a favorable number, there are also some easy, affordable projects that homeowners can take on their own to get their living space’s “real estate ready.”

1. Clean Up Your Space

A little elbow grease can go a long way. Take a weekend to roll up your sleeves and declutter your home. This can have a huge impact on how potential buyers view your home. Mortgage and real estate brokers can’t stress this point enough: a clean, decluttered home is easier to sell than a dirty, cluttered mess. It might take you a few days (and the cost of cleaning supplies), but getting down in the muck and the mud to beautify your home for buyers is one of the best investments you can make. Also, decluttered rooms appear larger, which can really add dollar signs to the value of your home.

2. Redo Your Entryway

In home sales, first impressions matter. Compared to other home improvement projects, replacing an old, out-of-date door with a new model really packs an ROI punch you can rely on, according to US News & World Report. This is low-hanging fruit, but it’s where the real gains are made. Ensuring that your home’s entryway is warm and inviting can go a long way in shaping the experience buyers have when viewing your home. Replacing your front door (especially if it lets in a draft) is a quick, easy way to give your home a mini facelift.

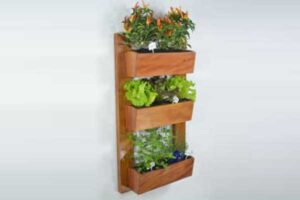
3. Beautify Your Home’s Surroundings

There’s a reason “curb appeal” is such a big concept in home selling. Take an afternoon or two to really dig into your front yard and garden spaces. A fresh mow and some new mulch in garden beds can make a huge difference. You want your house looking it’s best. Also consider adding plants to areas for a fresh punch of color and light. Just be sure to pick low-maintenance shrubs and plants. Try to stick with options native to your region that can tolerate drought, saving the green in your wallet.

4. Improve Your Lighting

Buyers prefer homes that are light and bright. Proper lighting is a natural mood booster, meaning adequate lighting actually makes your prospective buyers happier as they move through your home. Make sure to replace old bulbs with new ones before you invite buyers into your home, and don’t neglect the windows. Always clean your windows before a showing to ensure that your home is seen in the “right light.” It can also help to replace old light switches with new facings; it’s a quick way to give your walls a mini facelift, for almost no money at all.

5. Give Your Kitchen A Quick Remodel

It’s long been said that buyers purchase homes based on the kitchen. It’s an old adage, but it also happens to be true. Not in line for a massive kitchen renovation? That’s okay. There are simple and affordable ways to quickly improve your kitchen’s appeal for buyers. You don’t need to spend a fortune upgrading your kitchen counters or installing new stainless steel appliances, because a day’s work re-painting the kitchen cabinets can do the trick. Also consider replacing your drawer handles for a quick and easy remodel that can go a long way in improving the look of your drawers.

6. Give Rooms A Splash Of Color

Rooms looking a little tired? Painting can be a great way to revive outdated spaces, while also covering over any problem areas. Just don’t go overboard. Muted, neutral colors are more likely to appeal to a large pool of buyers. Stay away from bolder, niche choices like fuchsia, because you’ll be limiting your options. Repainting is a great DIY project for homeowners to take on. Try brighter, lighter colors to give drab or dark rooms a makeover. A new coat of white or beige paint can even make a room feel larger.

6 Simple Tips To Winterize Your Home

14th, January at 11:05 AM | Exterior and Interior Home Remodeling

It’s already pretty late in the winter season, but it’s never too foregone to start preparing for colder weather, snow and freezing rain. As home repair and construction experts, our contractors have seen far too many homes sustain damage at the hands of Old Man Winter. Take these 6 tips to heart at the first hint of cold weather and you’ll far ahead of your neighbors.

Even better, many of these tips will help to reduce your heating bill through the winter, ensuring that you stay warm without going over budget.

1. Strengthen The Envelope Of Your Home

Don’t pay for heat that leaks out through cracks in the molding! Holes and openings around your windows (both on the inside and out) allow warm air to escape the house and let cold air inside. Check around your windows every fall to ensure that your caulking is still tip top. Another option is to put up storm windows and doors, ensuring that your home is protected by a strong barrier. Storm windows are especially important in older homes.

In a more general sense, you want to make sure that the envelope of your home is solid and secure. Check the weatherstripping around your doors. If you can see light filtering in around your door, it’s time to invest in more weatherstripping, which is okay, because it’s incredibly cheap.

2. Change Your Furnace Filters

We know, we know – you’ve heard it a thousand ways, but most homeowners still forget to change out their furnace filters on a regular basis. Experts recommend that you change your filters on a monthly basis during the heating season, and it’s easy to see why. New filters reduce the energy demand on your furnace, allowing it to run efficiently without wasting heat. If your furnace needs a complete replacement, think about making the switch sooner rather than later. Your savings can really add up during the winter months, despite the initial investment.

3. Reverse Your Fanblades

Most homeowners just switch off their ceiling fans during the winter, but there’s actually a better option. Check any consumer ceiling fan and you’re likely to find a small switch that reverses the direction of the blades. During the winter, try flicking the switch to make the blades rotate clockwise. This re-circulates warm air pooled at the top of your ceiling, and it can really cut down on heating costs. Just by reversing your fanblade direction, you could save up to 10% on your heating bill, according to Popular Mechanics.

4. Turn Down Your Water Heater

It seems counter-intuitive when you want to stay warm, but reducing the temperature of your water heater is best practice. Most of your conventional water heaters are automatically set to 140 degrees Fahrenheit, which is hot enough to scald. Try lowering your heater to 120 degrees. You won’t notice a difference – until you check your heating bill. That minor change can save you up to 10% in heating costs for the winter.

In the market for a new water heater? Don’t forget to take advantage of the federal tax credit, which covers 30% of the cost.

5. Install A Programmable Thermostat

Still working with an old-school thermostat? It’s time for an upgrade! Lowering the temperature when you go out is one of the surest ways to save on heating expenses, but most of us forget. With a programmable thermostat that does the work for you, there’s no risk of human error.

Every degree you reduce your thermostat saves between 1% and 3% of your heating bill, so don’t be afraid to go light on the heating this season. You could end up saving a lot of money. Try putting on a sweater when you get cold instead of reaching for the thermostat.

6. Insulate, Insulate, Insulate

Insulation isn’t just for walls anymore. Go down to your water heater and give it a touch. Feel warmth? It’s probably time to insulate that sucker. You can find cheap water heater blankets at your local hardware store for about $20. Just throw one over your water heater to trap in the heat and save on your heating bill.

You can also use this method to insulate your water pipes; reducing heat loss through the pipes will cut the amount of money you spend on heating water throughout the winter. You can purchase pre-slit pipe foam at your hardware store, too. Just cut it to size, wrap it around the pipe and hold it in place with duct tape.

Now would also be a good time to check your other insulation around the house. Over time, insulation degrades, allowing cold air to seep in. Make sure you have plenty of coverage on your attic floor and your basement ceiling.

Money Saving Tips When Renovating Your Home

When you’ve decided it’s time to renovate your home, the cost is probably a major concern. No doubt you want to do whatever you can to save money while making the necessary renovations to your home. The following tips will help you save money when making renovations to your home.

Avoid A Complete Remodel

If you can avoid it, don’t gut a room and start from scratch. Only remodel the areas that need it. A room can be updated with some simple, but nice touches. You can refurbish existing fixtures. For instance, when doing a kitchen remodel, you can stain or refinish the cabinets and replace handles and knobs. Reusing existing fixtures can potentially save you thousands of dollars.

Wait For A Sale To Make Big Purchases

Buying home furnishings, such as appliances and furniture, can be expensive. Decide what you want and need for your remodel and wait for big-ticket items to go on sale before you make the purchase. Often, department stores will have big sales around the holidays. If you’re able to wait, you could save a bundle of money.

Choose Practical Solutions

When renovating a bathroom, for instance, you should choose a shower curtain versus shower doors. Not only are shower doors much more expensive, but they are difficult to clean. Opting for a shower curtain will give you the option of changing the look of the bathroom as often as you wish. And, you won’t need to squeegee shower doors every time you shower.

Sell Items You’re Not Using

You’ll probably be changing out fixtures or getting rid of furniture when you remodel. If you see there are items you no longer need or are updating, you can bet someone else can use those items. You should take advantage of that and make a little money by selling items you are no longer using. The money you receive from selling the items you no longer want can be put toward your renovation project. You can make quite a bit of money by selling:

  • Furniture
  • Light Fixtures
  • Appliances
  • Cabinets

Choose Mid-Grade Materials

Sometimes, it just doesn’t pay to choose premium materials. You can get great results by using mid-grade materials. If you’re doing a kitchen remodel, you don’t need top-of-the-line appliances that cost a fortune. Chances are good that you’ll be just as satisfied with appliances that cost less and are of good quality, but not the most expensive.

Pay Cash For The Remodel

Many people will use a credit card for purchases when remodeling a home. Often, this will lead to going over budget and buying unnecessary items. Have the discipline to pay using cash only. Not only will you save a lot of money, but you won’t have to worry about paying interest on top of the cost of your purchases. If you don’t have the cash immediately available, you can create a plan of action to obtain the cash you need to make the purchase. Using cash will save you hundreds versus using a credit card or taking out a loan.

Remodeling a home is a great way to update your home. You can do it room by room as your budget allows or you can do it all at one time. If you’re preparing to sell your home, you want to keep the remodel as inexpensive as possible, but maintain quality. You can increase the selling price of your home by thousands with the right remodel. If you’re making updates to your home because you want to keep up with the times, by following the aforementioned tips you’ll be able to enjoy your remodeled home for years to come.

6 Ways To Prepare During Autumn

8th, October at 4:32 AM | Uncategorized

Summer is quickly winding down. Hopefully, you took full advantage of the long sunny days with ample time in your yard or perhaps a few relaxing days indoors with your air conditioning on. Now, summer is coming to an end and the time has come to consider how to prepare your home for the upcoming fall season. Fall is the perfect time to accomplish some of the preparations necessary for the cold winter months ahead. This guide will explore six ways you can prepare your home during the fall season. Make these tasks more manageable by spreading them out over a month or two.

1. Fertilize Your Lawn

Agricultural experts say that a fertilized lawn can withstand a harsh winter better and will blossom faster when spring arrives. This is important more so for areas with high summer temperatures as grass grows quicker under such extremes. Dousing the lawn during autumn triggers new growth in both leaves and roots. Your lawn will be really healthy before winter sets in and able to take the harsh weather that is sure to come in the winter months ahead.

2. Service Your HVAC

Your AC has faithfully kept your house cool all summer. It’s time to appreciate its dedicated service so it will function smoothly for many years to come. First, clean the coils. You can find some tutorials on how to clean them on YouTube. Once you have cleaned it, be sure to cover the unit so that no debris or ice gets into the unit and causes damage. Next, you will want to work indoors. Start by changing the AC setting from cooling to heating. You will need to change the filters which help to keep the system functioning and all the residents of your house healthy. Finally, move around and check to ensure that all ducts are well covered and vents are open.

3. Cleaning Gutters

Most people dread cleaning their gutters. It can be a daunting task especially if you dislike heights. You will most likely have to use a ladder to complete the task, especially for the highest or furthest parts of the gutter. Clogged gutters should be taken seriously though because they can channel water in wrong directions and end up destroying the landscape.

Make the job a little easier by working with another person, and using a strong ladder. One person should keep the ladder firm while the other pulls the debris from the gutters. If the idea of gutter cleaning still sounds like too overwhelming of a task have no fear! There are plenty of companies you can hire to complete the task for you.

Cleaning-Gutters

4. Check Your Lawn Equipment

Over time, the unused gas in your lawn equipment can undergo chemical changes and form acidic or extremely basic deposits. These deposits are corrosive and can damage your equipment greatly. So it is always a good idea to drain the tanks of your weed whacker, leaf blower, and lawn mowers. Fall also offers you an opportunity to have the lawn mower blades sharpened.

5. Drain Sprinklers And Outdoor Faucets

If pipes remain with water in them it can really cause damage. Drain the water in the pipes and outdoor faucets to ensure that there is no ice accumulation over the winter. You will also need to ensure that all your outdoor hoses are disconnected. Be sure to turn off the water supply too.

6. Buy Your Snow Blower And Ice Melt

Winter can be tough, so you don’t want to be caught unprepared during the first big storm. It can really inconvenience you! Take the time to purchase ice melt in advance and if you are in need of a snow blower get it early before prices rise. As winter comes close, many stores will have run out of these supplies or increase the prices as people pour into the store. This is why it is a good idea to stock up on such things over the autumn when they are in full supply and more affordable. If you have anything left from last year, be sure it is in working order and usable condition.

Save Money When Heating Your Home

4th, October at 11:39 AM | Mold In Heat And Humidity

There are different ways affordable heating is available depending on the type of construction. For instance, some are fit for current buildings while others are suited for retrofitting the already standing structures. The following are some of the different cheap ways you should utilize in heating your household.

Use of Curtains

The most common means is the employment of curtains in your house. Since the sun provides free heat, you should open the curtains during the day to allow sunlight into the residence. When the daylight disappears, you are also supposed to fasten the curtains to insulate and warm your quarters. This measure can help you to save money and various anticipated expenses.

Utilize a Programmable Thermostat

Since you do not require a warm home all through, you are advised to capitalize on alternatives such as programmable thermostats. By installing them in your house, you can quickly determine the level of temperature you need in your room at a particular time. For instance, if there is nobody in the house, the thermostat can be programmed to lower the heat during daytime and raise it before you return. Equally, you are advised to decrease the temperature during the night to increase savings.

Utilize a Programmable Thermostat

Move your Sofa

You are supposed to move your seats away from the radiator to facilitate the free circulation of hot air in the room. This is because, when the couches are near the heater, they absorb the heat that should warm the room. Moreover, you can save money by a large extent.

Close The Gaps

If your house contains windows and doors with leaks, you should timely fix them to avoid wasting resources on energy. It is also advisable to choose a different energy saving alternative if you cannot be able to adjust the gaps completely. Tapes can be used to correct the gap problem, and equally, save money.

Renovate your Boiler

Ones the boilers are utilized for a lengthy period, their efficiency reduces, and therefore, you should consider replacing them with modern ones that can guarantee effectiveness, and subsequently, save money. Usually, they should not be used for more than ten years. The amount you can save by upgrading your boiler depends on your house and the type of pot if you opt for condensing boilers that are A-rated.

Open the Shades

The outside of your window is a free source of heat, and you should open it during sunlit moments. You are required to have the blinds and curtains open to allow the penetration of sunlight into your room. This sunshine will produce warmth in the house and can help you from running your furnace relentlessly, and therefore, save money.

Reflect the Heat

Given that radiator panels are often comparatively economical due to their easiness in fitting, you should use them in your homes to reflect heat to your room instead of the walls.

Wrap Up Your Hot Water Tank

It is expected that if you own a hot water tank, you should insulate or lag it properly. By doing this, the heating costs will be lowered because the water will be kept warmer for a more extended period.

Maximize Your Insulation

It is believed that approximately 25% of heat in structures is lost through the rooftops. However, it is advisable that you insulate your house by 25cm through the roof space. You should also monitor your walls to prevent loss of heat through the uninsulated walls. This alternative is appealing to homeowners because it reduces costs and so helping them to save more money.

Choosing The Right Fencing For Your Yard

12th, September at 11:53 AM | Uncategorized

When choosing proper fencing for your yard you always want to make sure the fence you pick meets the specific needs of your family. There are various reasons why you may need to fence your property. Your goal may be to keep kids and pets contained or perhaps increase the privacy of your yard. You may just simply want to boost the value of your property by giving the yard a nice look.

There are various types of fences to choose from as a yard owner.

  • Wood Fencing
  • PVC Fencing
  • Wrought iron fencing
  • Bamboo fencing
  • Electric fencing and several more
Right Fencing For Your Yard

When choosing the right fencing, always consider the following:

Privacy

If your greatest aim is privacy when installing fencing then choose a fence with little space between boards. A closely spaced frame can be nearly as private as a solid material when combined with other things such as climbing plants. The height of your fence will depend on the slope of your yard. You will want to take into consideration the distance of your neighbor’s yard from yours. Be sure to also consider where you position your seating areas and adhere to applicable local building codes in your area. You may want to use a length of paper or a cardboard to visualize the height of the fence you are considering. If you are installing the fence yourself, have a friend to hold up the paper while you are walking the perimeter of your yard. Ensure that you stand up and sit down in each area of your yard to see if the fence will be high enough for your privacy needs.

Shield The Wind

In some places including the Philadelphia area, the weather can get rather windy during certain seasons. If your goal is to block out some of the wind but retain the light or the grand view from a nearby site, the best option is glass fencing. If blocking the view is not an issue, then any privacy fence with few or no gaps between boards will serve the purpose well. When it comes to the height, keep in mind that if you primarily need to keep the wind out of a seating area, the fence should be a few feet lower than around an area where people will be standing.

Security

For many people who are looking into putting up fencing, security is a top concern for them. Features that serious consideration should be given in order to have a secure fence are height, “lack of grip” and a strong lockable gate. Any security fence, no matter the material, should be at least 8 feet high. However, you can add a few feet of grills at the top of a 6-foot fence for security details that does not look quite so imposing. Ensure you choose a fence with even boards and no horizontal rails on the outside. This is to deter potential trespassers from attempting to climb it.

Design

Consider a stepped in design for your yard fencing. If it seems like too much to have a tall privacy fence around your yard, consider fencing with a stair-step design to get privacy just where you need it. You could have a taller section of fence around your seating area. This will preserve your privacy as well as give you the design you desire.

Hire A Professional

Installing fencing on your own is always an option. However, the process requires specialized tools and hard labor. To cut down on some of the stress, consider hiring a professional, but first, check the company’s licensing status and references. Additionally, ensure the fence contractor will secure all the building permits you may need through your city. The local planning and zoning department in your area can provide you with a plat map of your property. This will help you to designate your property boundaries hence a better plan the fence’s location.

Fence Maintenance

Wooden fencing is one type of fencing that requires the most maintenance because of painting and staining required every couple of years. This will boost your property value by making your yard more beautiful. On the other hand, aluminum fences require little ongoing upkeep. This comparison makes those fence options friendly to many homeowners. However, wood fences offer the chance of being repaired more than metal.

What Is A Good Deck Maintenance Routine?

10th, July at 6:25 AM | Deck & Patio

A deck can be a great investment in your home. Having a comfortable outdoor space helps make your home more inviting and provides a great setting for relaxation at the end of the workday and over the weekend. Decks also can help boost the value of your home if and when you decide to sell.

Once you’ve made the decision to have a deck installed and the project is complete, it’s important to do the necessary maintenance to make sure your deck maintains its peak condition. A solid cleaning regimen is key – however, it’s important to make sure your cleaning routine is appropriate for your specific deck. Here are some things to keep in mind if you’re trying to draw up a maintenance and cleaning routine for your deck.

How To Safely Power Wash A Wood Deck

Power washing can be an incredibly efficient way to clean your deck, but it’s important to know what you’re doing. There are some simple mistakes that could end up causing serious damage to your wood deck.

Power washing is not recommended for composite decking, as most composite deck materials are too soft and easily prone to damage from high water pressure. If you’re looking to clean a composite deck, make sure to find cleaning products specifically designed for your type of deck.

Here are some ways you can make sure your power washing is done safely:

  • Start your water pressure extremely low and work your way up, finding the lowest pressure that still allows for effective washing. A starting point of 500-600 is a good rule of thumb.
  • When you’re starting the water pressure, always depress the trigger facing away from people and glass windows and at least 2 feet from the wood deck, then slowly moving it into a range of about 12-18 inches from the deck.
  • Soft woods like cedar and pine only need between 500-600 psi. Even for harder woods, you should never go higher than 1200-1500 psi.
  • Use a fan tip.
  • Try not to get within less than 12 inches of the deck unless the pressure is extremely low.
  • Test your pressure on less important areas before using it on your deck.

Power washers work great for large areas, but you may need to get on your hands and knees and do some hand washing and sweeping to get the smaller crevices of your deck.

Staining and Sealing

After you’ve finished cleaning the deck, it’s time to think about staining and sealing. A new staining will help restore your deck to a like-new color and sheen while sealing the deck can help protect it from the elements. Over time, rain, snow, and even sunlight can make your deck look old and in need of renovation. But a solid staining and sealing routine can help keep it looking brand new.

You can easily find out if it’s time for a new sealing by using the water test. It’s exactly what it sounds like – simply sprinkle some water on the deck and observe. If the water soaks into the deck immediately, it’s probably time for a new seal. If the water beads on the deck, you probably don’t need to reseal it quite yet.

Staining-and-Sealing

Developing A Seasonal Maintenance Routine

Deck maintenance can be simplified if you develop a seasonal maintenance routine.

We think washing and sealing your deck is best done in the late spring, once the weather starts to get warmer. Decks don’t get much use in the winter, but decks are exposed to the harshest weather during this time. A good spring cleaning can help protect your deck from mold mildew and make sure it’s in prime condition for the spring, summer, and fall.

Spring and summer are also good seasons to inspect your deck for any areas that could need repairs, such as cracks or signs of rot. Make sure to inspect the ledger, as this piece of framing supports the whole deck and is the cause of up to 90% of all collapsing decks.

If you didn’t wash and seal your deck this spring, then fall is also a good time. It’s generally best to do it when the temperatures are still mild, so September and early October are good times to do this. Do regular cleanings during the fall to clear off fallen leaves, sticks, and other debris. It’s also important to trim nearby bushes and trees and make sure that they’re less than 12 inches from the deck – this reduces the risk of developing mold, moss, or rot.

How Can The Construction Industry Go Green?

26th, June at 6:40 AM | Uncategorized
As the detrimental effects of fossil fuels become more well-known, various industries are starting to make the transition to green energy. Just as automakers have begun to develop high-end electric vehicles as alternatives to gas-powered ones, it’s important for the construction industry to do what they can to make their operations more eco-friendly. Fortunately, there are plenty of eco-friendly building practices available and it’s easier than ever for construction companies to reduce their carbon footprint.

What Is Green Building?

Green building is a method of construction where various resources are used to create homes and commercial

How-Can-The-Construction-Industry-Go-Green

buildings that are more energy-efficient and take less of an environmental toll on the planet. Green building isn’t just about using eco-friendly materials, but also using eco-friendly processes during construction.

What IS LEED Certification?

LEED stands for Leadership in Energy and Environmental Design. This green building program was started by the US Green Building Council, with development beginning in 1993. Today, the program is used to promote green building in construction projects across the globe.

Becoming LEED-certified may require additional upfront expenses for a company, but it can yield long-term savings through tax breaks, higher rents for residential buildings, and other benefits.

Benefits of Going Green

There are many benefits of going green for construction companies, the communities where they’re building and the people who live there, and for the planet as a whole. These benefits can be economic, environmental, and also improve the overall quality of life for employees in commercial buildings and tenants in residential ones.

Environmental Benefits

Of course, going green is first and foremost about protecting the environment. Without green building initiatives, new construction takes a devastating toll on the environment. Designing buildings with green principles in mind and completing projects with green building practices can help greatly reduce the damage urban growth has caused to our planet.

Specific environmental benefits of green building include:

  • Better protected biodiversity and ecosystems
  • Improved air and water quality
  • Reduced waste
  • Conservation and restoration of natural resources

Cost Benefits For Businesses

While the environmental benefits of green energy may be well-known, companies still need economic incentives to make the switch. Many CEOS may worry about how green building could affect their bottom line. Fortunately, there are some economic benefits to going green as well:

  • Reduced operating costs
  • Improved worker productivity
  • Higher asset values and profits

Community Benefits

Implementing green building practices helps improve our cities as a whole, along with the personal lives of our citizens. A greener city means a healthier city – both in the large-scale sense of the planet becoming healthier, along with individual health improvements.

Here are some community benefits that can be expected as more and more building companies institute green building practices:

  • Improved worker/tenant health and comfort
  • Better indoor air quality
  • Reduced strain on local infrastructure
  • Improved overall quality of life

How Can My Construction Company Go Green?

There are a variety of green building practices which can be used both for new projects and renovations to existing structures. Some of the most common practices being used in the construction industry today include:

  • The use of recycled and renewable building materials, such as recycled glass and steel, bamboo, and rubber
  • Energy-efficient doors and windows
  • Paints and stains with low VOC (volatile organic compounds)
  • Green roof systems, such as rooftop gardens, rainwater management systems, and protections against harmful UV rays.
  • Water harvesting and purification systems
  • Designs that maximize natural light, which helps reduce lighting requirements and energy costs, along with keeping buildings warmer during the winter
  • Buildings powered by renewable energy, such as solar panels

Inexpensive And Easy Ways To Upgrade Your Patio

7th, May at 7:13 AM | Deck & Patio

Upgrading your patio, deck, or backyard landscape can seem intimidating at first. However, it does not have to be an expensive or time-consuming process. Not to mention, as summer approaches, you’ll be glad you dedicated the time to improving your outdoor living space so that you can enjoy the warmer weather.

Here are a few ways you can easily, and inexpensively upgrade your patio.

DIY Outdoor Seating

Creating do-it-yourself seating for your backyard patio is a fantastic alternative to the significant investment required to purchase furniture. This might not even cost you anything at all depending on the materials you have available at your disposal.

While there are many options for making your own outdoor seating, one of the easiest is to use concrete blocks. Simply stack the blocks to an appropriate height and shape, line with a cushion, and throw a few pillows on top. This type of seating can be incredibly comfortable, and can perfectly match the aesthetic of your patio.

Lighting

Applying unique, decorative lighting to your backyard landscape is a great way to improve the ambiance that surrounds your patio, and there are several approaches you can take to do this.

String lighting is one of the cheapest and easiest to set up lighting methods for any backyard. You can hang these lights from trees, hang them over bushes, and spread them across your backyard to provide an incredible lighting arrangement.

Accent lighting is an ideal way to emphasize certain aspects of your patio that you think deserve extra attention. Lightology provides an excellent guide which details exactly how you can use accent lights to create a wonderful aesthetic.

Lastly, hardscape lighting is a great way to bring life to hardscape features such as brick or stone bars and retaining walls.

Vertical Gardens

Vertical gardens are the perfect way to upgrade the appearance of your patio area while going green and without breaking the bank. Vertical gardens can provide your backyard with character and style.

All you need to get started is a blank wall, some scrap wood, and something to plant.

Vertical-Gardens

Incorporate Stone

Incorporating stone is an easy way to instill a natural, comfortable feeling to your backyard while adding some variety to your decor. Stone can be used to create decorative walkways or to add a new seating area.

Add a Fireplace

Adding a fireplace to your patio is sure to make it feel more relaxed and inviting. A fireplace serves as a central gathering area for you and your guests to enjoy time together.

A fire pit can easily be put together with two materials: stone/brick and cement. Simply stack your stone or brick, seal with cement, and throw in some fuel. If your city doesn’t allow an open wood fire, you can also opt for a natural gas outdoor fireplace.

Use A Unique Paving Material

Cheap paving materials such as gravel and crushed rock allow you to inexpensively develop walking areas without sacrificing style.

Alternatively, you can consider getting creative with the placing of your pavement if you choose a more traditional material like stone or brick. By spacing your pavement around swatches of grass, you can save on the amount of total material needed to pave your patio.

By taking some of these methods into consideration, you can easily upgrade the appearance of your backyard and patio area without sacrificing your hard-earned money.

What Type Of Countertop Is Right For Your Home?

10th, April at 7:45 AM | Kitchen & Bathroom

Countertops are a necessary part of any home. They serve as both an aesthetic and practical function. However, with the numerous alternatives in the market, which countertop material is best for you?

Granite Counters

Granite is a preferred countertop material when there are no other things to dwell on — such as the budget. It defines stylishness in a kitchen. As granite use becomes more prevalent in many homes, the cost comes down.

Pros: Luxurious, rich look natural stone, scratch-resistance and durability.

Cons: Classy, hard, and needs habitual sealing and can flake (although chip revamp can be a DIY task which is also effective)

Ceramic Tiles

Ceramic tile is easy to clean and durable. On top of being so reasonably priced, it is a great option for countertops for an average residence. Because it is installed a section at a time and most imaginative homeowners can complete it.

Pros: has a wide array of options, heat-resistant and versatile design

Cons: Grout must be correctly sealed, or it will tarnish, tiles can chip and be tricky to restore

Engineered Stone

Engineered stone is made up of about 93% quartz particles. It is obtainable in a broader assortment of colors when compared to granite and has a nonporous exterior that is scratch resistant. It is simple to maintain, devoid of any annual sealing necessary by natural stone.

Pros: Resistant to acid and stains; easy care.

Cons: Costly.

Solid Surface

Since solid surface counters are purely what the name suggests, solid, every scratch can be sanded out. The solid surface countertop is tailor-made to your requirements by the manufacturing companies.

Pros: A variety of colors, easy to clean, durable and tough

Cons: Fairly costly and have poor heat resistance

Laminates

Laminate countertops bear trademarks like Nevamar, Wilsonart, and Formica. They are made from plastic-covered synthetics with a silky surface that is trouble-free to clean. The pieces are cut according to size and finished at the ends.

Pros: Affordable, easy to clean and excellent style range

Cons: Some look inexpensive, scratch somewhat easily and not resistant to heat

Butcher Block Or Wood

Wood countertops present a gorgeous warm look and are obtainable in an assortment of finishes and colors. Hardwoods like oak and maple are the most often used wood countertops.

Pros: Several looks available, within your means and warmth of natural wood

Cons: Must be oiled and sealed correctly frequently to avoid water damage

Stainless Steel Counters

For a genuinely industrial and contemporary look for your kitchen counter, stainless steel is an excellent material. The Stainless Steel counters are durable and heat resistant. Since they are built to your specifications, you can get a perfect countertop.

Pros: Easy to clean, beautiful, scratch-resistant and very durable

Cons: To some extent, they are sterile in looks and pricey

Soapstone Counters

Soapstone usually has a dark grey color and a smooth feel. It is common in historic homes, but it can also be used in contemporary homes as both sink material and a countertop.

Pros: Deep color; smooth texture; a bit stain resistant.

Cons: Needs regular repairs with mineral oil applications; might crack and get dark with time

Marble Countertops

Owing to an exceptionally high price tag marble counters are not commonly seen on the countertops of the entire kitchen. Marble needs invariable maintenance, as it effortlessly stains. Some new sealers also delay staining.

Pros: Eye-catching looks

Cons: Not customarily employed in kitchens owing to the likelihood of staining and often require and proper sealing

Marble-Countertops

Finally, ensure that you select a countertop that is within your financial plan. When you are remodeling a kitchen, there are lots of things to think about including flooring, appliances, and cabinets.