Author Archive

Getting Rid Of Mold On Stucco

Because of stucco’s non-absorbent surface, when mold grows on stucco it will generally grow directly on the surface. There must be two important factors involved for the mold to be able to grow, these are water, and organic materials, which feed the mold. These materials can be anything that is organic and from the earth, including dirt, grass or other plant life. When humidity is high, water will almost certainly remain on a stucco wall, creating the perfect hospitable environment for mold to grow. To find out more about stucco in general go here.

Mold On Stucco- How Can I Stop Stop The Mold?

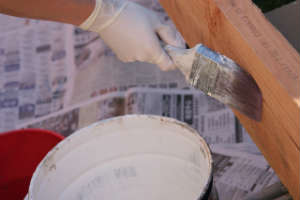
If you wish to prevent your stucco from growing mold, be sure to maintain a clean wall. Make it a part of your weekly maintenance to hose off any dirt, mud or grass that collects on the wall. If there are no nutrients available for mold to feed on, it will be unable to grow. It is also important to try to maintain dry stucco to prevent mold growth. If you live in a humid climate, purchase a dehumidifier and use it on a regular basis to dry your stucco wall. Additionally, you can paint your stucco with a mildewcidal paint to keep moisture from penetrating the wall. You can purchase mildewcidal paint at Home Depot and even on Amazon.

In more serious cases, the plaster of your stucco wall can be compromised by larger amounts of water and humidity. These serious cases can cause major, permanent damage to your stucco. For example, flooding can lead to large amounts of ground water and dirt penetrating the bottom of your wall, causing the perfect opportunity for mold to grow inside of your stucco wall. To prevent serious cases like this, be sure that you install proper drainage outside of your home. Roof leaks or roofs lacking roofing paper can cause similar cases on the upper part of your stucco wall.

How Do I Remove Mold?

To remove mold from your stucco surface, mix 5 parts water to 1 part bleach and spray it directly on the moldy part of your stucco wall. Scrub the area with a sponge and rinse the bleach with a hose. Be sure to wear gloves when mixing and spraying bleach to protect your skin from dangerous and painful chemical burns.

If your mold problem is more severe, such as in cases where water has penetrated your stucco wall and mold is growing on the inside, you will need to remove and replace the infected stucco. In order to do this, you will need to rent or purchase a circular saw and remove the sections of stucco that are moldy. You will also have to remove the building paper behind the stucco before replacing it. Use a stucco patch liquid or commercial stucco mix to fill the area you have removed. Typically a job like this is no small feat, and can be better off in the hands of a professional. To repair your stucco surface with a serious mold problem, contact a mold remediator.

Common Problems With Stucco, Their Causes, And How To Fix Them

30th, September at 12:48 PM | Stucco Repair & Remediation

When stucco installation is done perfectly, it can certainly help make the home more fire retardant, less prone to noise pollution, and more energy-efficient. Nonetheless, if stucco installation is not properly maintained or is poorly installed, countless stucco issues can arise which can eventually severely damage your home.

What Causes Stucco Issues?

Oftentimes stucco related issues are related to water. In most cases, they usually have to do with extra moisture being trapped within the walls in your home.

Here are the most common stucco problems and how to fix them:

1. Staining of Stucco Exterior

If your stucco remains untreated, rainfall can surely take a toll on your home’s exterior. Rain brings with it an array of contaminants that can become absorbed into the stucco and result in stains. Rainwater can also wash contaminants from the windows and roof into your stucco. Ultimately, this can lead to huge deposits of contaminants on your stucco. This leads to the overall deterioration of the substance.

Solution: You should contact a stucco remediation team that will utilize environmentally friendly products to get rid of the contaminants. After this, the professionals will then utilize a low-pressure water spray in order to effectively clean the stucco. Lastly, the experts will apply a water-resistant sealer that prevents similar problems from recurring in the future.

Can you perform this kind of repair yourself in order to save some money? Yes, however, if you don’t have enough experience or instruction from experts, it’s more likely that you’ll end up damaging the existing stucco. Mitigating such damage can end up being much costlier than simply hiring a team to take care of the issue from the start.

2. Mold on Stucco

Mold is constantly a concern every time you deal with issues of excess water retention and moisture. Indeed, mold issues are very serious given that they can damage both the structural integrity of your home and the health of your family. This is without mentioning the unsightly effect that mold can produce on the exterior of your home if it starts to grow on stucco.

Solution: The primary step is to establish and exterminate the source of moisture or whatever is allowing water to accumulate.

Secondly, the stucco affected by the excess moisture needs to be removed. Afterward, you need to identify any potential structural damage and replace it with sound foundations. Lastly, a professional will install another stucco system coupled with a high-end water management system to prevent the recurrence of similar issues.

As with many issues in home remodeling, planning is key to avoiding them in the first place. When it comes to mold growth on stucco, this is no different. An experienced team will be able to foresee potential sources of mold before they apply stucco to your home and prevent you from having to deal with such issues in the future.

Unfortunately, if you don’t know to ask about mitigation steps, it’s possible that the business you hire to complete the work is not doing them.

3. Cracking of Stucco

Two types of cracking problems exist in stucco homes – the more comprehensive ones and the localized issues.
Normally, water damage underneath the surface is the main cause of localized cracking. General cracking might be a result of shoddy workmanship during the stucco installation.

Solution for localized cracking: A professional repair team will work to handle joint work as well as install a coating system that greatly strengthens the stucco system without changing its look.

Solution for the comprehensive cracking: If the cracking is because of more serious flaws as a result of poor

installation, then it is highly recommendable to conduct a complete stucco replacement.

Preventing Future Stucco Issues

If you own a stucco home and are struggling with issues related to moisture, then there is some great news. After you have identified the stucco problem affecting your home, you can always contact a professional to help you address them.

The good thing about talking to an expert is that you do not get a surface-level solution. Instead, you work with him/her to get to the root cause of the specific issue. From there, the two of you work together and give the stucco system a total overhaul with high-quality craftsmanship. This way, you are able to prevent any future issues from taking place.

If you are concerned about the costs of fixing stucco issues in your home such as the ones highlighted above, consider that not taking care of the issues as soon as possible could end up being even more expensive in the long run. Likewise, hiring an inexperienced business to solve the issues simply because they quote you a lower price, can also result in higher costs over time.

We always recommend speaking with multiple vendors before settling on one. Additionally, in researching the business you’re considering giving your hard-earned money to, also look for reviews from past customers online. The majority of the time, it’s easy to find feedback from past clients; such input can prove invaluable in helping you completely mitigate issues with stucco in your home.

Sunrooms and More

8th, August at 6:52 AM | Sunroom Installation

Sunrooms are very practical structures designed to let in a lot of natural light. More broadly speaking, they are constructed in addition to the core house elements.

Largely used as places to relax and enjoy the outdoors without having to deal with the elements, homeowners build sunrooms primarily for personal enjoyment. Additionally, building a sunroom can be a great way to add value to your home.

Whether it is hot outside, rainy, or windy – sunrooms offer a safe and unique shelter from where you can enjoy the weather conditions outside without being impacted by them. For instance, you can observe beautiful spring rain all around you from the comfort of your chair next to the big window.

This concept of sunrooms is becoming a global trend. As of now, it is popular in United States of America, New Zealand, Australia, Canada, and across Europe.

Materials Required To Build A Sunroom

The first thing you’ll need to consider when building a sunroom is what type of materials you want to use.

There are many different options available, from traditional wood framing to more modern materials like aluminum or PVC. The most common materials to build a sunroom’s frame include: wood, breeze block, PVC, glass and brick. On the other hand, the roof of the sunroom is commonly built with the shingled roof materials.

You’ll also need to decide whether you want glass walls or screens. Glass will provide the best view of the outdoors, but it can be more expensive. Screens will be cheaper, but they won’t provide as good of a view.

Industry trends show that aluminum continues to grow in popularity primarily because it is not a heavy material, and is endurable. Considering this, it also tends to carry a premium in price.

Heating & Cooling Sunrooms

Another thing to consider is how you want to heat and cool your sunroom.

If you live in an area with mild weather, you may not need to do anything special. However, if you live in an area with hotter summers or colder winters, you’ll need to take steps to keep your sunroom comfortable year-round.

One option is to install a split system air conditioner, which will allow you to cool the room in the summer and heat it in the winter.

If you’re not opting for an A/C system, you’ll need to think about ventilation. Sunrooms can get very hot in the summer, so it’s important to have a way to let out the hot air. A ventilation system will help to keep a sunroom fresh in the summer and regulate the amount of heat in the winter.

Furniture, Decor, And Lighting

While the materials used to construct your sunroom are important, the furniture you use in your new sunroom are also a critical choice.

With furniture is how you can really make the space your own. Consider adding comfortable chairs and a table so you can enjoy the outdoors without having to leave the comfort of your own home.

Another important consideration is lighting. Sunrooms are designed to be bright and airy, so you’ll want to make sure you have plenty of light. One option is to install skylights, which will let in natural light from above. Artificial lighting options are extensive and also important, as they will help you set the ambient in the sunroom.

Getting Your Sunroom Underway

How you want to construct your sunroom depends entirely on you. There are numerous ways and ideas. In this article we identify six ideas as a guide to help you choose the most suitable and enjoyable sunroom for you. So, let’s start.

  • The purpose of having a sunroom. This is the crucial question to ask yourself. Once you know what the purpose of your sunroom will be, the following steps will be much more exciting.
  • Examine your home. Look around your home for the ideal area where you would setup the sunroom. Usually this is the area where it’s sunny for most of the day.
  • Brainstorm on the design. You have the purpose, you know the place. Next thing you need is to imagine how your sunroom will look like. Try to sketch it on a piece of paper or on your computer. In addition, you can also look for catalogs to get more ideas. There are a plenty of possible solutions, and you can customize your sunroom in your own way. While you are planning on design, consider limitations of building if they exist.
  • Materials. This is an important part of the process since it is closely related to the design. How you want your sunroom to look like depends on the materials you will use too. We already listed most commonly used materials; however, if you have something else on mind, we would suggest contacting professional construction companies to discuss the options.
  • Windows. This is what makes a sunroom special. Big windows give you the opportunity to enjoy the view of nature even when it is not practically possible to do it from the outside (due to various weather conditions). Make sure the windows are designed in a way that allows you a beautiful and broad view for reaching maximum enjoyment. Also, check with the seller for the U-value of windows – the lower the number the more energy efficient.
  • Finishing. You now have everything you need to start-up a sunroom of your own. We suggest considering professionals to make your dream sunroom come true. It is a safe option worth considering. You will in addition need electricians and plumbers to make sure your sunroom is fully functional.

Stucco Crack Repair

7th, July at 7:09 AM | Stucco Repair & Remediation

In one of the previous articles we discussed stuccodryvit, and the advantages of stucco over dryvit. If you missed that article and would like to know what these advantages are, we recommend you to read it: www.link.com

Stucco is an extremely strong and very reliable kind of material that’s been used by millions of people. Nevertheless, even the best quality stucco requires to be maintained regularly and appropriately in order to avoid its degradationIssues with stucco may be various; however, there is one in particular which happens to be most common of all, and that is – cracking.

Cracking can occur for numbers of reason, including extreme weather conditions, accidents, and age. If you face the cracking issue with your stucco, we recommend that you read this article until the end and find out how you can repair and remediate the stucco. Firstly, let us tell you how you can tell if your stucco needs some help or not.

How Do I Know If My Stucco Needs Remediation

A number of indicators that help you identify the stucco issue vary, considering that there are different symptoms by which you can identify the issue of stucco cracking. Here is the list of the most common ones:

  • Brown streaks or stains under the corners of your windows
  • Brown streaks or stains at the intersection of roofs and walls
  • A smell of mold in your home
  • Damp or wet carpet/flooring
  • Discoloration at the base of your window
  • Leaks in windows and doors

What To Do If You Identify Any Of These

If you have identified one or more of these, it means it is time to take some action and protect the rest of the stucco areas from being affected. First thing you need to do is to identify the direction of the crack. If it spreads horizontally, it is probably a minor issue and you can go ahead, read this tutorial and try fix it yourself. However, if the crack spreads vertically, we recommend contacting a professional since it is very possible there is an issue with the foundation.

So, if it is a minor issue, follow these instructions and you will be good to go.

1. Identify the stucco color. It can be either that the stucco was painted, or it has remained in its natural color.

  • Painted stucco. This would be an easier way, since after repairing the stucco all you need is to paint it again using the same color as it was applied before.
  • Natural color stucco. It is possible that the stucco changed the color over the years, so what you need to do is experiment with the mix of new stucco in order to get the desired color, e.g. in order to match the color of new stucco with the one of damaged stucco. This way your entire area will match again.

2. Order a stucco caulk. Apply the caulk onto the cracks, and smooth it so that the area around the crack matches the rest of the area. After that, you paint the ‘new-stucco-area’ so that you cannot see the difference between that and the rest of the area.

If the crack appears to be large, then once again we would advise that you call for professionals if you are not completely sure that you can do it yourself.

Professional Assistance

There are a number of companies which offer their assistance. If you live in greater Philadelphia area, Delaware County or Montgomery County, then look no further than Murtagh Bros. Inc. 18 years of experience with stucco repairing and remediation has been a guarantee to professionally take care of your stucco issues. The skilled constructors from the Murtagh Bros. Inc. do not only fix the issues on the surface. Instead, they do investigation in order to determine whether there are some major issues behind the cracking. They will eliminate any possible further issues and make sure the construction of your home is safe.

Tips To Help Keep Your Balcony Safe & Sturdy

11th, May at 12:13 PM | Uncategorized

Get Regular Inspections

Of course property owners need to conduct an inspection of their own building and balconies on a regular basis. However, it is also helpful to hire a professional to provide a high quality, detailed inspection on an annual basis. Generally, doing this in the early spring – before high use of the balconies happens – is necessary mainly because the freezing temperatures in the winter can create structural insecurities.

Look for warped wood and rotted out pieces. Refasten any loose boards present with new screws and anchors. Additionally, look for any splintering areas. Cracks in the cement or other material need to be noticed, especially if they are growing over time. Here are some additional things to know:

  • Large cracks in concrete and stone require professional repair. When these are present in the floor of the balcony, an expert is needed to improve the structural integrity of the balcony.
  • Support posts and balusters also are subject to wearing down over time and can pose just as much risk to the balcony user. Look for rotting, excessive rusting, and areas of damage.
  • Railings are one of the most common areas to deteriorate. Rust, rotting wood and looseness are big factors here. Ensure these are secured properly.
  • The railing floor brackets and wall brackets can come loose over time. This can create an easy situation for someone to fall. Check these every few months for safety.

Can You Make Repairs Yourself?

If you notice small cracks or crumbling cement, it may be possible to do some work yourself. It is always wise, though, to hire a professional to handle the repairs for you instead.

Crack fillers, which are generally applied using a caulk gun, work well for minor problems. You will need to choose the right product for the surface and material. You’ll also have to prepare the area properly and use a putty knife to level it. In addition to this, any type of concrete patching product needs ample time to dry and set. It will take time to make these repairs.

In any situation, if the surface, railings, or support structures of a balcony have any signs of damage or deterioration, take action. What you see on the surface is also an indication of what is happening deep within the cement pad or other structure. This is why you need an expertly trained professional to inspect (go here for a balcony checklist) and handle any and all repairs on your balcony for you. Do this on a regular basis to ensure the safety of anyone who uses it.

Fighting Mold In Heat And Humidity

23rd, January at 5:44 AM | Stucco Repair & Remediation

Having a clean home exudes pleasure whenever you are relaxing around your house. However, over the summer, these ideal moments can be interrupted by molds that form during that period. This is because of the hot weather over this period that raises the humidity levels to over 75% which is enough to form molds. Moisture, air, and food are other factors that enhance mold formation.

Though mold is known to be environmentally helpful for enriching the soil by destroying organic materials such as leaves, it can cause serious health problems to human beings. Such health issues to people include respiratory complications, throat, nose and eye irritation, asthma, sinus congestion and great dangers to infants, pregnant women, and elderly people. It is more dangerous when exposed to those with existing respiratory conditions, and it should not be kept in any home for long after its detection.

What Causes Mold In The Home?

Molds are caused by excessive moisture in the environment. This can be due to leaks, high humidity, or improper ventilation. Additionally, molds require food and air to grow, so making sure your home is clean and free of clutter will help reduce the opportunity for mold growth.

When temperatures are high and humidity levels stay this way for longer periods of time, that’s when molds get to thrive. Molds prefer damp conditions, but they also need food to grow. Generally, any organic matter or porous material can be a source of food for molds.

What Keeps Humidity Levels Low In The House?

To avoid humidity levels rising too high during the hot season, it’s important that your air conditioner function perfectly. If you notice any problems with its performance during the hot summer months then contact an expert as soon possible for help managing these risks. Meanwhile, you can also keep down excessive moisture by making sure all windows are open so breezes flow through them at night time. Otherwise, condensation mayl build up causing mold or mildew on surfaces inside homes which is exactly what you want to avoid.

Additionally, use mold inhibitors instead of carpeting in your bathrooms. Look for any water leaks and patch up these areas if any is found and clean thoroughly to make sure no mold has formed.

A dehumidifier is one other thing that will keep humidity levels low around your home. Its fan draws in moist air and carries it through an evaporator that is refrigerated. Over the hot summer period, your dehumidifier should operate for long hours to remove moisture so as to avoid the formation of molds around your home. Keep your dehumidifier clean at all times. You should also ensure that refrigerant levels are high because insufficient levels freeze the coil making the system function poorly.

There are other areas in your home with a little more moisture than other areas such as the bathroom and kitchen. Getting rid of molds is not that hard if you know how to deal with it, however to some extent you might need the experts to help you deal with it. You can ensure that your home is free of molds by keeping your air condition or fan in check and always running. You can also use disinfectants such as ethanol to spray in areas with concentrated water and leave it for some time before rinsing. While always disinfecting use latex or rubber gloves to protect yourself from harmful chemicals.

Look for ways to ensure that your house has increased the flow of air during the summer. That can be done by doing some of the things mentioned above as well as making sure to move furniture away from the walls around your home. Ensure that the dark and confined areas are properly ventilated. Be sure to avoid condensation in your basement which can be musty if left unchecked. Insulating walls, running a dehumidifier, installing a thermal pane window or storm will help clear some condensation. By doing so, air circulation will remain adequate around your home.

General House Airing Out

Air out your closets by opening them and run a fan or vacuum cleaner to help keep humidity levels lower. You should also clean them regularly to ensure that there is little chance of mold formation and growth. Always ensure that the cleaning is done while taking proper precautions with chemicals involved in the cleaning process where necessary.

However, in extreme cases it is important to to seek professional help if you have serious mold accumulating in your home that can adversely affect your health.

What Are The Health Effects Of Mold Exposure?

Mold exposure can cause an array of health problems. Individuals with asthma are at a greater risk for health effects from mold exposure, as are individuals who have weakened immune systems.

When individuals are exposed to molds that can trigger illnesses hay fever and other allergic reactions. Mold exposure has also been linked to respiratory problems, infections of the lungs (such as pneumonia), flu-like symptoms (such as fatigue or headaches), coughing & wheezing, eye & skin irritation, sore throat, bronchitis, and more.

In The News: America’s Fastest Growing Cities (2022 Update)

8th, December at 7:06 AM | Uncategorized

The U.S. Census Bureau measures the rate of population growth in major metro areas and they’ve released the most recent estimates for population growth in large American cities, which are incorporated areas with more than 50,000 people.

What Makes A Growing City With Enviable Living Conditions?

There are many factors you could look into as to what makes a growing city. The fastest-growing cities in the U.S. have high population growth and a high percentage of people with college degrees. This is beneficial because the city’s job market is likely to be more competitive than other places. With a large number of people, it’s easier to attract more businesses and increase the local population.

Job growth is an essential component of a growing city and might be the most reliable proof that a city is thriving. Employment growth is an essential that goes without saying. The economy of a particular city is very important as well. Financial resources are vital to any city with the hope of growing and striving to improve their state of affairs. Education plays a huge role in a city’s development. A well-educated community means a more skilled and productive workforce; as the old cliché goes “knowledge truly is power”, this is a clear-cut way to vastly grow your city.

The state of Texas has consistently been ranked as one of the fastest-growing states in the country, with both population and income growth at record levels. For this reason, it should come as no surprise that more than one of the cities listed below are located in Texas.

Examples Of Rapidly Growing Cities

Houston, Texas

Houston, Texas is one of the fastest growing cities in America. Houston has one of the most prosperous energy sectors the country has to offer. The city’s ability to produce and supply energy is astounding. Their medical tech firms have been highly acclaimed and regarded as some of the best in America. The state of Texas has increased its oil productivity twice as much this year than in previous years. The oil industry certainly helps a country or city’s economy if managed properly; it’s not hard to see why Houston is a blooming city.

Phoenix, Arizona

With nearly 2 million inhabitants, Phoenix, AZ, is one of the USA’s largest cities. Nevertheless, it remains a hotbed of growth. Affordable housing, low crime rates, and healthy living are often touted as some of the factors that have led to Phoenix’s growth.

Austin, Texas

Austin, Texas has previously been ranked second on Forbes magazine’s America’s fastest growing cities. Their median income is currently at $ 63,500. They have a job growth rate of 3.14 percent; this is well above the national average. Austin, Texas is a place where small businesses flourish. With a GDP of about 5 percent they are undoubtedly one of the fastest growing cities in America.

Seattle, Washington

Seattle, Washington is definitely another fastest growing city in America. The average income for a Seattle native is $ 72,000 that is prodigious considering the way our economy has been in a shambles. If you are making that amount of money your city is clearly moving in the right direction. Their gross metro product growth is currently at 3.35 percent, which is very impressive. At a time in which the world’s leading powerhouse has had economic struggles of epic proportions these cities are hopes that a better tomorrow is possible. Surely, growing cities can only be a positive thing for the construction industry.

Most Efficient Way To Paint Your Home

Painting your house seems easy enough yet when you walk into a room that hasn’t been painted well, you know it. If you’re thinking about putting up a fresh coat of paint in your house, read our tips on how to master the art of painting.

Painting Your Home: Tips For Doing It Perfectly Every Time

There are a few easy ways that you can ensure that your home will look fabulous after painting. Our tips for interior painting include:

Budget, Plan, And Schedule

Perhaps it should go without saying, but before embarking on any home remodel project, it’s critical that you establish a budget and plan around it. This is no different when it comes to painting your home inside or out, even if this kind of project can seem simple enough.

One of the benefits of tackling home remodeling projects one room at a time is that it provides you with an opportunity to see your plans come to fruition over time. In addition, this also allows you to schedule work around your daily routine (and that of your family) and hold off on things that don’t have to be completed right away.

One thing that may not be easy about scheduling a painting project is coming up with the most efficient way for you to spend your time. Even if you plan out every step from start to finish, this can still lead to delays and unnecessary expenses if things don’t go as smoothly as planned

Choose The Right Paint

There are six different kinds of interior paint, including:

  • Matte: This has no sheen or finish to it and is most commonly used on walls. It is good for hiding imperfections, however, matte paint does need to be touched up much more frequently and is easily marked.
  • Matte Enamel: Similar to matte, this paint isn’t damaged or marked as easily. It’s also easily cleaned so it is a great paint for kitchens where things might splash onto the wall more frequently.
  • Satin: This paint provides a sheen but isn’t glossy. While this is a great paint for rooms where frequently cleaning may occur, it does tend to be unforgiving when it comes to imperfections in the wall.
  • Eggshell: While this paint hides imperfections a bit better than satin, it does have a shine to it that some may not enjoy. That being said, it usually takes much less eggshell paint than matte to fully cover a wall.
  • Semi-Gloss: This shiny paint is typically used on trim rather than walls and is very easy to clean with just soap and water. It’s easy to apply and usually only takes one coat.
  • Gloss: Although you can use gloss paint on walls, the level of shine makes it unappealing to most. Gloss also shows all imperfections, so it is typically used on the trim.

Whichever paint you choose, keep in mind that each has a different drying time. Paints with more shine will take longer to dry.

Prepare Your Room For Paint

In painting your home, preparation is key to making sure that your painting project turns out the way you want it. Among other things, this means that you need to be certain that your surfaces are dry and free of dirt and debris before you begin to paint and that all obstacles are removed.

A few days before painting, be sure to move all of the furniture away from the walls, dust, and wipe down all areas that will get a fresh coat. If there are any rough spots, consider taking sanding paper and smoothing out the surface, however, if the paint is more than 40 years old, be sure to get it tested for lead before you sand. If any repairs need to be made, this is the time to do them.

Just before beginning your painting project, protect your floors by applying painter’s tape and rosin paper on top. Remove any hardware around windows, doors, or other areas that you don’t want to paint. Apply liquid glass guard about two inches around the panes of all windows – or use painter’s tape.

Ventilation

Make sure that the room you are painting is well-ventilated. If this isn’t possible, consider using a window fan to help circulate air throughout the room. If possible, be sure not to work in a room where the temperature is too cold or hot as this can lead to headaches and dizziness.

This also raises another important point that should be considered anytime you are completing work in your home: be sure that you take care of yourself. If you find that you are experiencing negative health effects when you are working in your home, stop what you are doing and rest. If you continue to feel bad, seek medical attention.

Paint In The “Proper” Sequence

The majority of professional painters tackle a project in the following sequence:

  1. Window Sashes
  2. Trim
  3. Cut In Edges
  4. Walls

What is “cutting in”? This means taking a brush and carefully painting a few inches around the trim. This way, the walls can be completed quickly with a roller without having to get the roller too close to the edges.

When using a roller, don’t apply too much pressure, otherwise, you will leave lines on the walls.

Painting from top to bottom for each layer is also a way to ensure that you can avoid imperfections and overlaps. For instance, if you paint the top of a wall first, then get your roller on the wall at the bottom, you will likely end up painting over some of what you just painted.

Be Patient – Let The Paint Dry

This is often the most difficult part about painting, after all, you want to enjoy your fabulous remodel! But it’s very important to let the paint dry for at least 5 – 6 hours, if not overnight. Then you can remove the glass guard or tape, replace all of the hardware, and sit back and admire your work!

Home Projects To Complete During The Winter Months

11th, May at 7:33 AM | Stucco Repair & Remediation

Winter, for many of us, remains a slow season. Unlike spring or summer, winter is usually too cold for us to spend too much time outside. However, this does not mean that you should laze around watching TV all day. There are fun things to do. Instead, think of handyman projects around your house. Perhaps it is an all-new project within your home. Better yet, fixing and repairing some of the broken stuff here and there. In this review, we have compiled a list of home projects you could consider during this winter.

Kitchen Renovations For The Upcoming Family Meals

Winter comes with exciting holidays, and that means family gatherings. This year’s season does not have to be all mistletoe and feasting. You could put some of your great ideas on renovating your kitchen for the upcoming big meals. Some of these exciting projects may include:

  • Remodeling your kitchen into an exciting shape as a little project
  • You may consider putting up a new counter to surprise some of your visitors. Do not let your expected visitors get bored with the same old rusty counter for years. This winter let them appreciate a sleek refurbished kitchen counter.
  • Instead of sticking to your old habits of fixing broken cabinets, think of some new elegant shelves. Shelves add a modern touch to any kitchen. Furthermore, shelves allow space opening for your kitchenette making it look improved.

Finishing Your Basement

You might need a contractor’s help in finishing your basement project left unattended. Think of tasks like painting your basement wall to the color of your desire. Alternatively, you could also think in terms of flooring. Demolition tasks may not require a contractor’s help hence do it alone. It may save you up some little coins for a contractor. With all that idle time indoors during this winter, put some thoughts into these tasks. You could also consider installing an efficient drainage system. During the winter, it is easier to spot the annoying and recurring basement floods that you would want to do away with.

painting-for-renovation

Gutter And Roof Cleaning

Just like the decks, you are probably wondering how to do these cleanings. Working on your roof and gutters subzero temperatures is not all that you desire. It remains a tiresome and painful handyman’s job but remains essential. Consider these reasons as a motivating factor for doing tending to your gutter and roof:

  • Getting rid of pests

Snow-filled gutters are good pest harbors, especially for rodents. Snow acts as a good insulator hence making good pathways for large rodents

  • Preventing damages

Cleaning gutters are utterly important. If left unclogged, frozen heavy water may damage your roof by weakening them. This may not be desirable as roof repairs may not be as cost-friendly as you may think.

Install Your Decks

You could also put some consideration into your yard. You are probably thinking of how you could replace your decks yet it is cold out there. It is all possible! Just wait until it starts thawing. The late winter phase may really be useful. Once it starts to defrost, all that falls into your mind are the upcoming summer months. While many people install their deck during that time, you could go against the crowd. Try something different this winter season by installing a deck. If you already have a working deck, then consider fixing it. It probably needs some here and there repairs before the summer months finally kick in. I bet you want to have some easy time making barbecues in the nice spring evenings.

Carry these home projects at less cost this winter. They will save you a couple of hard-earned dollars. Besides, you are guaranteed a perfect house during winter. Spend less energy and make your home a better place.

Do Some (Limited) Gardening

While winter is not the ideal time for growing flowers or vegetables in general, it is still possible to grow hardy plants such as cactus that can withstand cold weather conditions if done right and protected properly from the elements. If you want to grow some flowers instead, you could try planting pansies in pots as these can survive the winter months as long as they are taken care of.

The best time to do most gardening is usually around the end of winter, when the most sensitive plants have likely already succumbed to the lowest temperatures. Also, it’s always good to keep in mind that, if you have potted plants outside, you can bring them indoors to ensure they make it through the winter.

Fix Cracked Flooring

Within the walls of your house, there is probably flooring that needs repair. Most likely, it will be a small patch from a leak or some rain damage . Within this area, you could remove the cracks you find and fill them with joint compound or epoxies. Be sure to take note of the direction and spacing of the cracks when doing so. You would also have to form the patch by hand since most auto body filler tools are not usable within this area.

Repair or Upgrade Plumbing Fixtures (Toilets & More)

Even though it is not usual to see a good many plumbing fixtures break down during the winter, it happens either from some damage you have made upon cleaning them or the constant freezing and thawing that they are exposed to. If your toilet bowl is cracked, overhaul it by removing the broken pieces. Then do a nice job of re-grouting. When this fails to work, just change the entire toilet bowl if possible.

For leaking faucets and taps, you could fix them yourself as well. A small job such as this presents a great opportunity for you to practice building skills that would come in handy for bigger projects in the near future.

Install Interior Lighting (Or Make Repairs To Existing Ones)

Interior lightning can go a long way when it comes to changing the look of the inside of your home. Installing lights also gives you a sense of security, especially at night. It is possible for you to install some new lights on your home but beware of poor wiring. Check with an electrician to make sure that your home’s wiring is in good condition before making any changes.

Improve Air-Ducts & Ventilation

As a common problem, air-ducts and ventilation system requires regular maintenance and attention. This would mean that you should get them cleaned often and check the filters on a regular basis to ensure that they are working properly. Also, make sure that there are no gaps between the vents in your ceiling. If necessary, you can close off these gaps by setting up some plastic vent covers. You can also try installing exhaust fan motors if you have storage space beneath the fans which can be really helpful at times.

How To Keep Snow And Ice From Damaging Your Deck

24th, August at 7:44 AM | Deck & Patio, Stucco Repair & Remediation
As a deck owner, it is imperative to look for ways of taking good care of your composite or wood deck material in the same way you would look after any expensive item that you have. More specifically, as a thoughtful deck owner, it’s likely that the cold winter months have made you wonder…

Should Snow Be Removed From Decks?

When it comes to snow and ice, your outdoor deck is designed to withstand more weight when compared to other structures such as your roof. Even then, getting rid of any snow from the deck is considered a great safety measure.

Ice From Damaging Your Deck

The following tips can help you prevent damage and destruction of organic or synthetic decking material when you are removing ice and/or snow that has accumulated after a winter storm.

Prepare Your Deck Before The Snow Begins

As a homeowner, there are several moves that you can make to ensure that you have a well-protected deck. One of these moves is to take a safeguarding step, AKA a preventative step, way before it even begins to snow.

The first measure you need to undertake is to clear away all the potted plants that are on your deck. Once you have done that, it also a great idea to use a water-resistant tarp to cover any patio furniture that may be present on the deck and which you don’t intend to store inside.

Use a soft brush and soapy, warm water to get rid of the mold, the leaves, and another kind of debris that can deteriorate the surface of your deck. To protect your deck further from too much moisture, use a high-quality seal that can also resist water.

It’s true – you don’t need to take these preparatory steps, but you will be glad you did once winter is upon you.

Use The Correct Shovel

When removing ice or snow from your deck, a plastic shovel is the best tool to employ. This is because metal shovels and a number of other sharp tools can bring a lot of destruction.

Commonly-encountered decking materials such as cedar or redwood are known as “softwoods,” which means that they may easily scratch if you don’t use a plastic shovel when removing snow or built-up ice. However, even the most durable composite decking materials are not totally resistant to scratching and the other types of destruction that a metal shovel can cause.

Once you’ve got your plastic shovel and you’re ready to get to work, keep in mind that as you’re removing snow from the deck, you want to go with the deck board’s “grain” as you shovel. It is also better to shovel parallel to the deck boards as opposed to doing it across – you don’t want to work perpendicular to the “grain”. In this manner, you are less likely to cause scratches or otherwise corrupt the surface of your deck boards, regardless of the material.

Use A Broom

Whenever possible, and especially when snowfall is considerably light, you should try to use a broom to remove snow from your deck. Your deck’s surface cannot be damaged or scraped by the soft bristles of a broom. Similarly, brooms are preferred over shovels when removing snow or ice from deck rails and other deck surfaces.

As with snow shovels, be mindful of brooms with metal components that may, in one way or another, come into contact with the surface while you’re cleaning and damage your deck.

Do Not Use Salt!

Some people have used salt for the purposes of clearing a deck of snow without understanding the significant damage that it can cause.

Most notably, salt is quite effective at drying out the wood in your deck. In addition to this, salt damage can even extend to other components of your deck including but not limited to joist hangers, screws, and nails that are used to join the wood at various points.

Lastly, salt can cause all these aforementioned components (and more!) to corrode. When this occurs, you may end up with a very unstable deck that could collapse due to the damage. As you can imagine, if anyone happens to be on top of, or even nearby to, the deck when it gives way, they may suffer significant injuries.

Sand, Gravel, & Rocks

Gravel, rocks, and sand can also cause a great amount of damage to your deck. These materials are capable of grinding down the composite or wood surface and cause substantial damage. Once more, you should avoid these at all costs.

Steer Clear Of Dyes And Colorants

Many homeowners opt to use a form of ice melt rather than salt. While these are often safer options for pets and children, many products contain dyes or colorants. Be careful if you chose to disperse these products on your deck boards as the dyes can permanently stain composite or wood decking in some cases.

Leave A Layer

There are countless other reasons why it is important to get rid of the snow from your deck.

One of these is to ensure that the weight which your deck is supporting does not become too much. If this is the main reason for which you chose to remove snow from your deck, then consider that it is equally important to leave a few inches of snow behind, as a thin layer can help to prevent you from scraping the wood.

It’s so important that it bears repeating – although we always recommend and advise that it’s best to use a plastic or rubber-blade snow shovel, you should remember that any shovel, no matter the material, can scratch the surface of your deck boards.

By initiating these simple precautions, you can rest assured that your deck will be safe from damage during snowstorms and ready for use again in the spring.